With our upcoming update we have decided to, among many things allow you the choice of uploading your own samples so that you could get a better vision of how the IR you’re checking out sounds with you playing through them! We have decided to help you create these samples with a quick guide in case this is something that you haven’t done before.
The sample you need to create basically consists of your recorded signal chain without the cabinet. Below are 2 Methods of how to create a sample that will be able to be used within our library to try the Impulse Responses out instantly!
If you are using a digital “Rig” today, then this is a very easy solution. Most digital Amp Sim’s already have the option of disabling the built in Cabinet or IR. In this example i used TSE’s X50 – Where you can click/double click the cabinet section to activate or inactivate IR from being used within the signal chain.
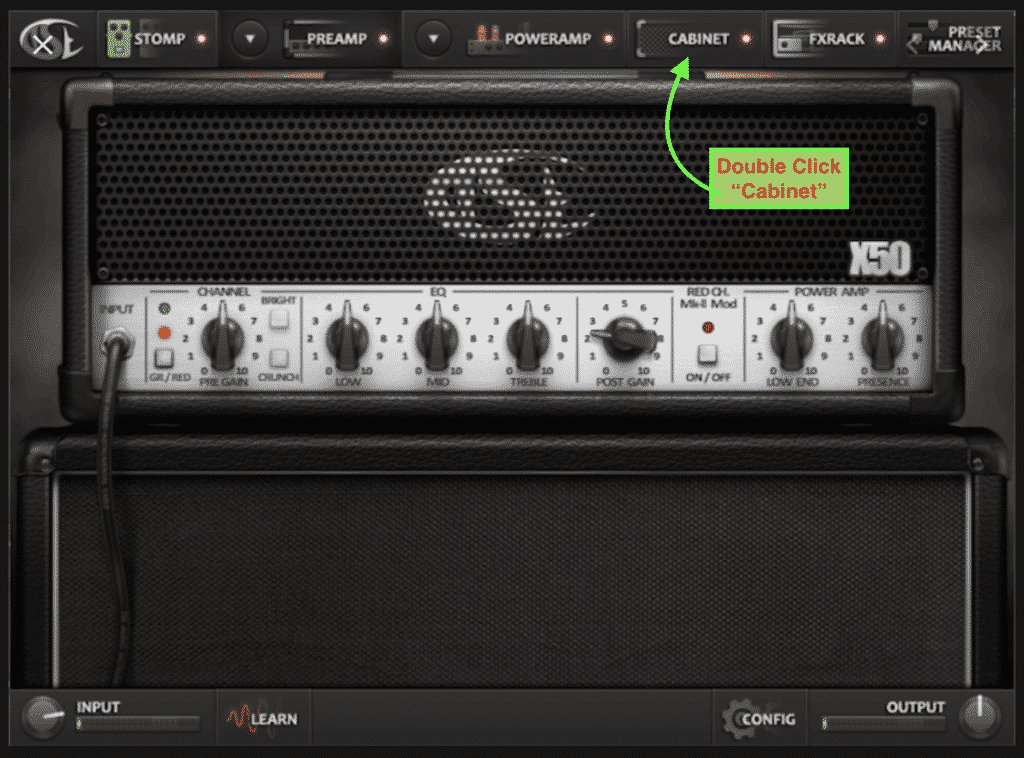
Basically record a riff just as you normally would in your DAW, and afterwards turn the Impulse Response/Cabinet off, and bounce out the result. There! You now have your finished sample that you then can upload! You can do this in similar ways within most Digital Amp Sims.
If you happen to use an actual Amplifier, to create a sample for the library is slightly different. You will require some extra hardware consisting of a DI box and a Sound Card. The reason for this is that you want to bypass the Power Amp section of your Amplifier that drives the physical cabinet, effectively recording only the signal chain up to your Pre Amp. To do this, You will be utilizing the FX Loop of your Amplifier.
What you will do is connect a cable going from the “SEND” of the FX Loop to a DI Box that later goes into the input of your Sound Card/ Audio Interface.
A DI Box stands for “Direct Injection” and the purpose of it is to convert an unbalanced and/or high impedance instrument signal into a format suitable for direct connection to a mixing console’s mic input – without the use of a microphone.
This will be the signal that you will be recording for your sample. In some cases an Amplifier requires both the “SEND” and “RETURN” to be connected for the FX Loop to be able to work – If this is the case you only need to connect a cable to the “RETURN” and leave it hanging – effectively connected to nothing.
CAUTION: Make sure that your Amplifier is still connected to your actual cabinet, as it still requires the load from the cabinet to work. If the Amplifier is not connected to a Cabinet this could in the worst of cases result in damage to your hardware, which will not be fun for anyone involved.
After you have recorded your riff you bounce it out and you now have your finished sample ready to be uploaded!
Mad Steex is a Sound Engineer/Producer from Italy that mainly works with Rock/Metal production using…
Here i have decided to share my favourite Impulse Responses (IRs) from our Library that…
In this video Carl discusses the update and shows Users how to register and upload…


