Or impulse responses in general

With our upcoming update we have decided to, among many things allow you the choice of uploading your own samples so that you could get a better vision of how the IR you’re checking out sounds with you playing through them! We have decided to help you create these samples with a quick guide in case this is something that you haven’t done before.

The sample you need to create basically consists of your recorded signal chain without the cabinet. Below are 2 Methods of how to create a sample that will be able to be used within our library to try the Impulse Responses out instantly!

Method 1: Digital

If you are using a digital “Rig” today, then this is a very easy solution. Most digital Amp Sim’s already have the option of disabling the built in Cabinet or IR. In this example i used TSE’s X50 – Where you can click/double click the cabinet section to activate or inactivate IR from being used within the signal chain.
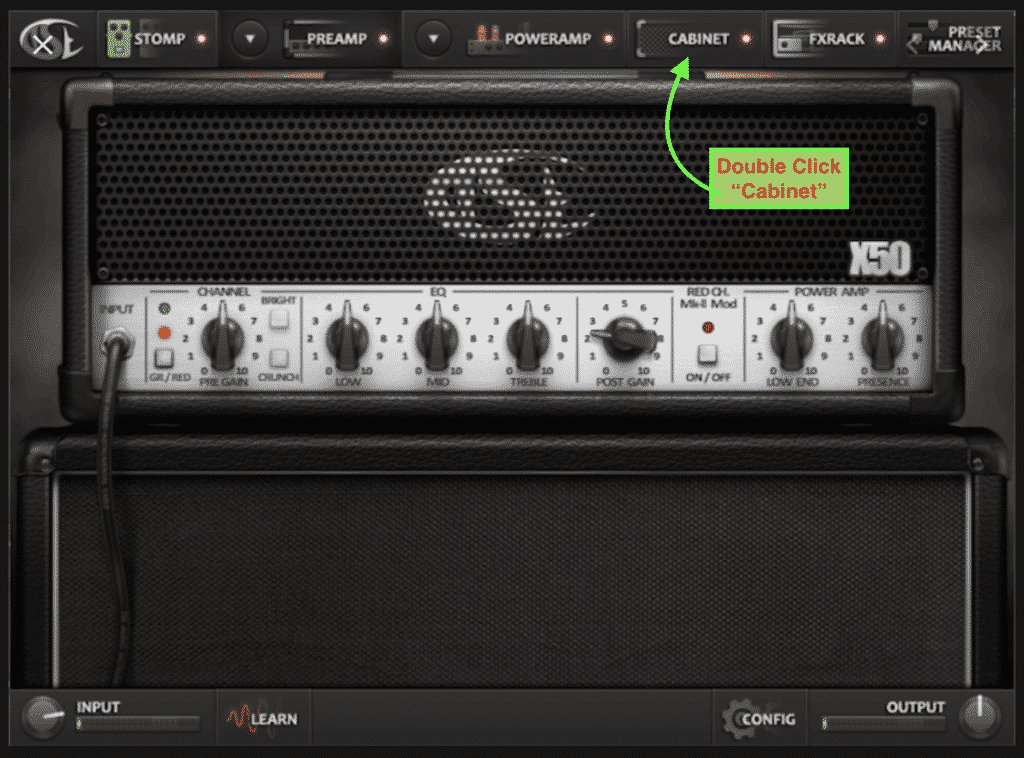
, How to record a sample for our library

Basically record a riff just as you normally would in your DAW, and afterwards turn the Impulse Response/Cabinet off, and bounce out the result. There! You now have your finished sample that you then can upload! You can do this in similar ways within most Digital Amp Sims.

Method 2: Analog

If you happen to use an actual Amplifier, to create a sample for the library is slightly different. You will require some extra hardware consisting of a DI box and a Sound Card. The reason for this is that you want to bypass the Power Amp section of your Amplifier that drives the physical cabinet, effectively recording only the signal chain up to your Pre Amp. To do this, You will be utilizing the FX Loop of your Amplifier.
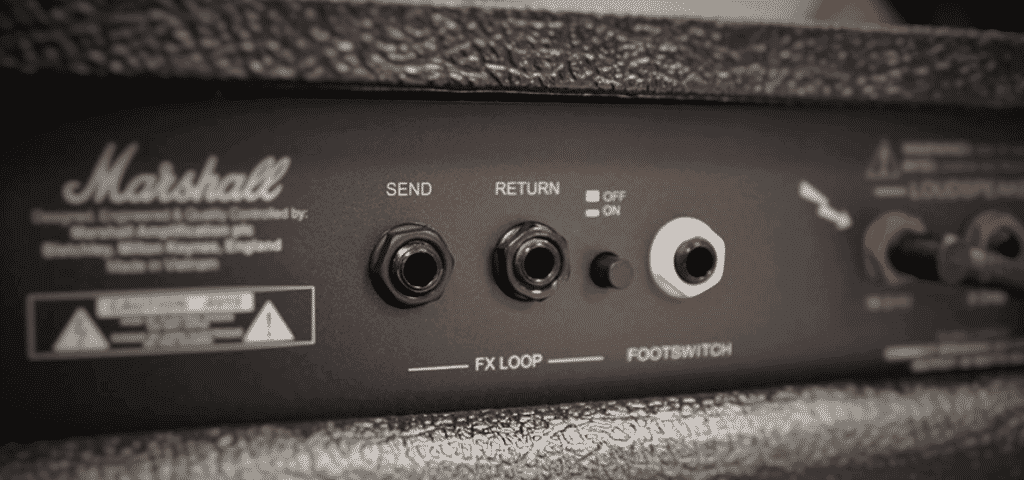
, How to record a sample for our library

What you will do is connect a cable going from the “SEND” of the FX Loop to a DI Box that later goes into the input of your Sound Card/ Audio Interface.

A DI Box stands for “Direct Injection” and the purpose of it is to convert an unbalanced and/or high impedance instrument signal into a format suitable for direct connection to a mixing console’s mic input – without the use of a microphone.

This will be the signal that you will be recording for your sample. In some cases an Amplifier requires both the “SEND” and “RETURN” to be connected for the FX Loop to be able to work – If this is the case you only need to connect a cable to the “RETURN” and leave it hanging – effectively connected to nothing.

CAUTION: Make sure that your Amplifier is still connected to your actual cabinet, as it still requires the load from the cabinet to work. If the Amplifier is not connected to a Cabinet this could in the worst of cases result in damage to your hardware, which will not be fun for anyone involved.

After you have recorded your riff you bounce it out and you now have your finished sample ready to be uploaded!

0 Comments

Submit a Comment

Your email address will not be published. Required fields are marked *

Related posts

Chat GPT 4 picks Impulse responses (Heavy metal)

The 10 steps to the heaviest of metal.First, I started with this question "Act like a metal head and go through our production process step by step and make sure we produce the heaviest of metal" To which Chat GPT 4 responded: "\m/ Alright, dude! Let's make sure we...

July top 10

Here is the top 10 most downloaded impulse responses during the month of July.No. 1 Fender Twin Reverb Tube-Combo with 2x12" Jensen speakers. SM57 off-axis From our Rocksta reactions series, Robert Holms fender twin reverb takes the first spot Recorded with an SM57 at...

Soundwoofer in numbers

Hello! Marcus here, just wanted to drop in and give you some insights into where the Soundwoofer project is right now. (Last updated on 2021-07-16) Most featured brands in rig libraryMost used microphones Equipment/component valueTotal component value of the "rig...

Carl’s 5 Favourite Impulse Responses (so far!)

Here i have decided to share my favourite Impulse Responses (IRs) from our Library that i have noticed myself using more frequently than others. In the end it always comes down to taste, but i have noticed that the following Impulse Responses have always "fit in the...

How to Register and upload your first Impulse Response.

In this video Carl discusses the update and shows Users how to register and upload Impulse Responses to the library. https://www.youtube.com/watch?v=v8UX1P9ti3s

Soundwoofer – Youtube Introduction

Carl Gustavsson and Marcus Hermasson discuss Impulse Responses, how Soundwoofer was created, what Soundwoofer does and the goal they want to achieve.

Alternative Methods to Use Impulse Responses

Hey everybody, Carl here again! Today i wanted to talk about other other methods where you can use Impulse Responses to your benifit when mixing your projects. Other than recreating great tones from cabinets, it can actually be used to enhance certain characteristic...

How to Upload and Use the Soundwoofer Library

Today i want to show how you will be able to use our Library when searching, downloading and uploading Impulse Responses using our Technical Preview. - Mind you this is still a work in progress as our Technical Lead has more features coming, But the actual...

New User Submission!

Todays upload features a great example where you can expand your imagination when it comes to using Impulse Responses. "I have blended between 6 different impulses from the Soundwoofer library on the guitars and i have even sent the room sound of the drums into a...

Recording Session at Rocksta Sound Ranch

A couple of days back we had the opportunity to visit Rocksta Sound Ranch to talk about Soundwoofer, and how to use and record Impulse Responses. They had a rig already set up for recording guitar solo's, so we decided to show them how to create an Impulse Response of...
Share This